To use POTTS and this manual you should possess a basic understanding of Linux, the boot process and encryption. Ideally you have successfully performed an Arch Linux installation before.
Insert a USB drive that can be overwritten – all data on that drive will be lost! It should have a capacity of at least 512 MB.
Find out which device name was assigned. Examples:
> dmesg | tail
> lsblk
> lsblk --fs
For our examples we assume your USB drive is /dev/sdc.
Write the image to the USB drive. Make sure that all data has been written to the drive before you unplug it.
> zcat potts-usb.img.gz | dd of=/dev/sdc
> sync
> eject /dev/sdc
Attention: At several occasions we mention resetting the TPM. Don't do this if you still have encrypted data that is linked to your TPM.
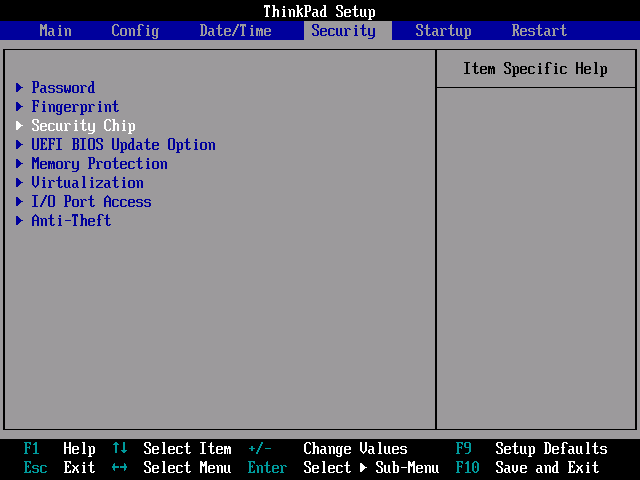
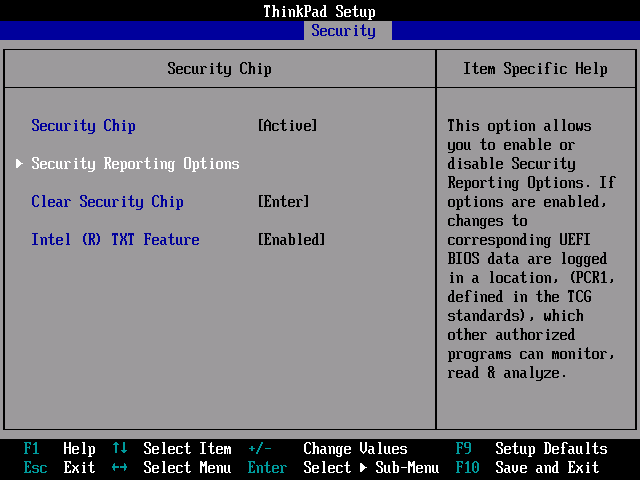
Enter the (BIOS) setup of your target system and confirm that the TPM is enabled / activated. Usually there is an option “Security Chip”, “TPM” or something with “TCG”. If available, examine options regarding what parts of the system should be measured.
Lenovo Thinkpads for example may have these options under “Security”, “Security Chip”. Another example is the Intel mainboard “DQ67SW”, where you should look for “Configuration”, “On-Board Devices”, “Trusted Platform Module”. Consult the manual of your notebook computer or mainboard for more information.
Also configure your system to boot from USB drives. Then save all changes and restart the system.
When booting from the USB drive, you should see the following screen:
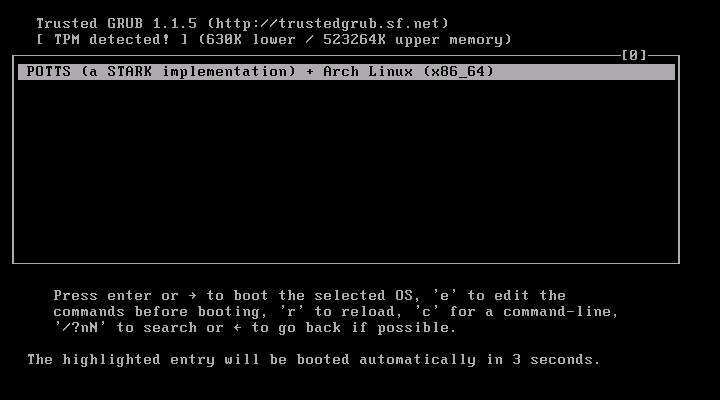
The most important information on this screen is “TPM detected!”. If this screen says “No TPM detected!”, you could try to use the “Clear Security Chip” function or something similar in your BIOS. Attention: At least on Lenovo notebook computers, this option may be visible only if you start up the system from a powered down state, as opposed to a restart (see the Lenovo Support page for details).
Press enter to continue booting, press F10 at the POTTS start screen:
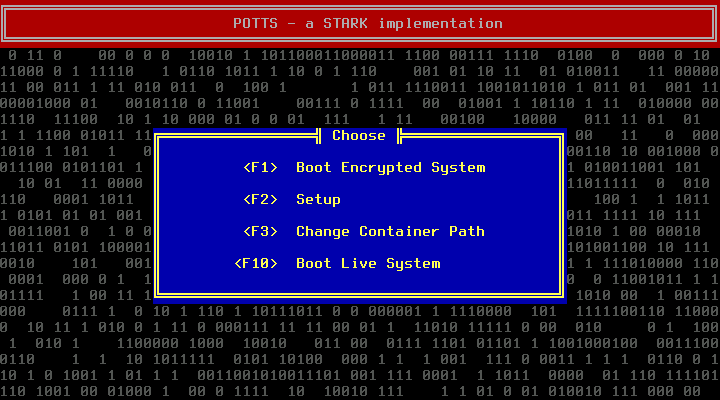
The machine will boot into the Archiso Live system.
TPM-Tools like tpm_unsealdata depend on TrouSerS. Start the daemon:
root@archiso ~ # tcsd -f &  ;sleep 1
[1] 603
TCSD TDDL ioctl: (25) Inappropriate ioctl for device
TCSD TDDL Falling back to Read/Write device support.
TCSD trousers 0.3.10: TCSD up and running.
root@archiso ~ #
(-f is used to enable debug output, sleep 1 prevents that output from mixing with the next prompt.)
The important part is “TCSD up and running”. Test whether sealing does work:
root@archiso ~ # echo MySealTest | tpm_sealdata -z -p 1 -o test.sealed
root@archiso ~ # tpm_unsealdata -z -i test.sealed
MySealTest
root@archiso ~ #
If this works, you can type in reboot and continue with the next section.
However, if you get the following error message, try reseting the TPM from BIOS (see above):
root@archiso ~ # echo MySealTest | tpm_sealdata -z -p 1 -o test.sealed
Tspi_TPM_PcrRead failed: 0x00000006 - layer=tpm, code=0006 (6), TPM is deactivated
255 root@archiso ~ #
(The Archiso prompt shows non-zero return codes (255 here) in front of username@hostname.)
Another possible error is:
Tspi_Key_CreateKey failed: 0x00000023 - layer=tpm, code=0023 (35), No EK
Run tpm_createek to fix this.
You may get this slightly different error (usually after resetting the TPM):
Tspi_Key_CreateKey failed: 0x00000012 - layer=tpm, code=0012 (18), No SRK
In that case, you need to take ownerwhip of your TPM by setting a owner password and a password for the Storage Root Key (SRK) first:
root@archiso ~ # tpm_takeownership -z
Enter owner password:
Confirm password:
root@archiso ~ #
You will never need the owner password for the operation of POTTS. However, it is required for some operations on the TPM, so you should probably set it, and keep it secret.
Specifying -z sets the SRK secret to 20 bytes of zeros. Otherwise the SRK secret would be required every time some data is (un)sealed. As a result you would need to enter a passphrase before the system can proof it is in the expected state. So the SRK secret could be easily obtained through an Evil Maid Attack. Since we can not protect the SRK, POTTS does not support a non-zero one currently.
Taking Ownership can be done only once. The next attempt will probably fail with:
Tspi_TPM_TakeOwnership failed: 0x00000008 - layer=tpm, code=0008 (8),
	The TPM target command has been disabled
To change the owner or SRK password then, use tpm_changeownerauth. This requires the current owner password. If you can not recall it, reset the TPM from BIOS.
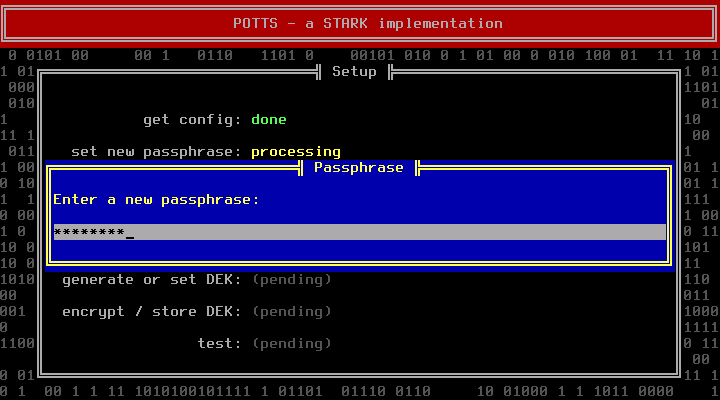
(Re)boot into the POTTS main screen. Press F2.
You will be asked to enter a new passphrase. Choose a good one.
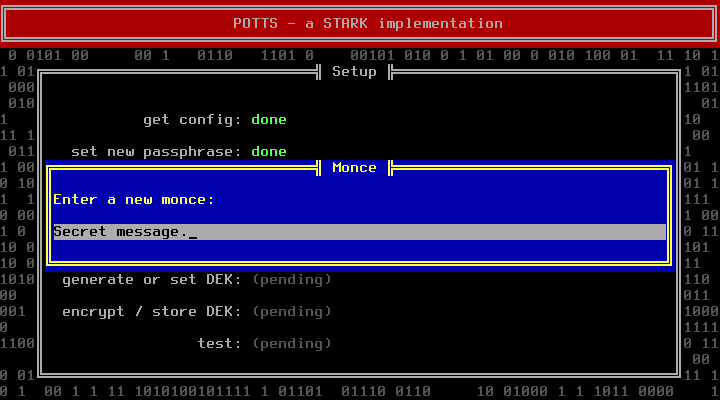
Think of a first monce and enter it when requested:
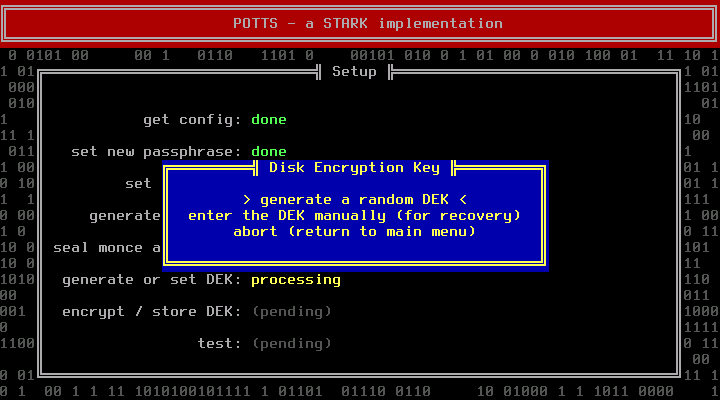
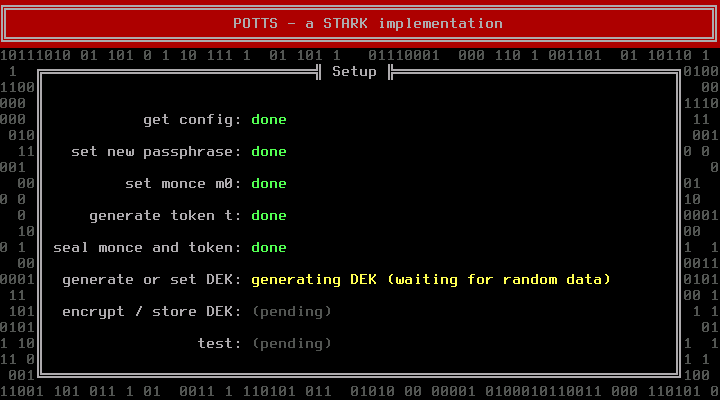
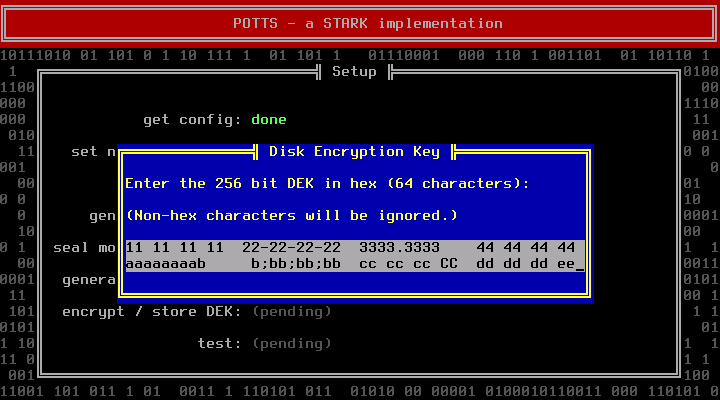
The next step deals with the Disk Encryption Key (DEK). If you are installing a new system, you should let POTTS generate a random DEK. Manually entering a DEK makes only sense if you want to use an existing container. The token and the DEK are generated by reading from /dev/random, which can take some time if the system runs out of entropy. Pressing random letter keys can speed up this phase (do not press enter, it will acknowledge the next dialog before you can read it).
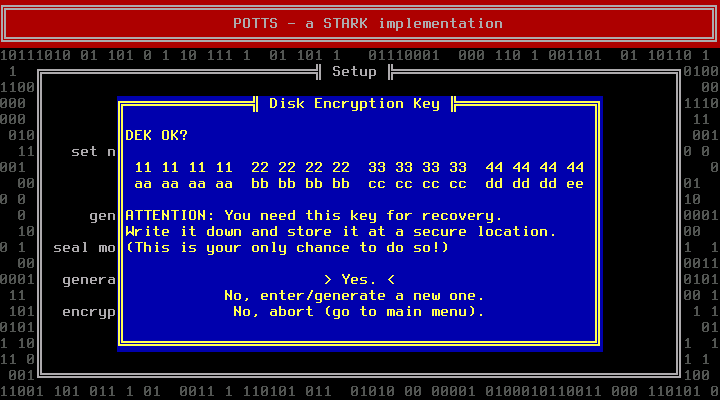
POTTS will show you the DEK. Write it down. This is your only chance to do so. You will need it for recovery purposes. Store it at a secure location.
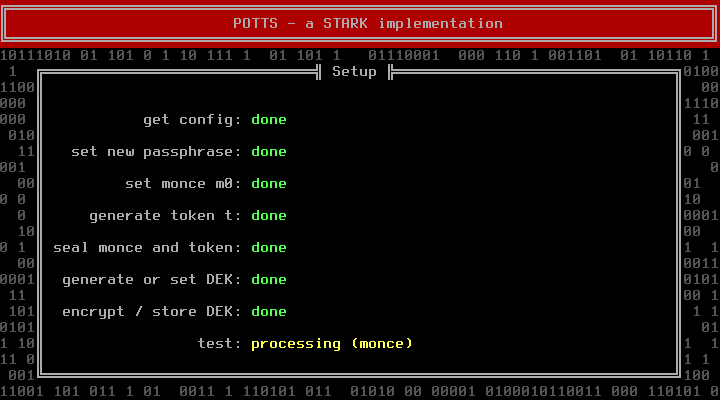
After that POTTS will run some tests. During those the DEK will already be loaded into TRESOR.

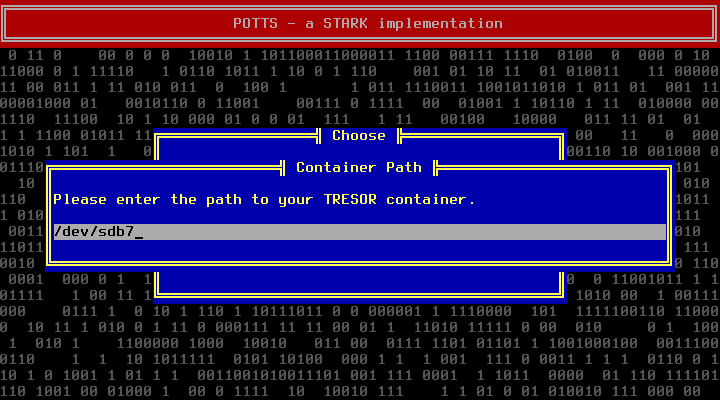
If you do already know the partition name of the encrypted container (e.g. /dev/sda2), you can press F3 at the main screen and enter it right now. It's fine to postpone this step; we will remind you at the end of the next section.
For the following steps, the DEK has to be loaded into TRESOR already. This is the case after completing all setup steps (F2) successfully. Alternatively you can follow all steps of the boot process (F1) but the last one (choose “No” when asked whether you are ready to boot).
Then, at the POTTS main screen, press F10 to boot into the Archiso Live system. From there you can create a new encrypted container and perform a base installation of Arch Linux into it.
To figure out the device name of your target hard disk, run lsblk:

Start by creating a partition for the encrypted system:
(We assume /dev/sdb for our examples.).
root@archiso ~ # cfdisk /dev/sdb
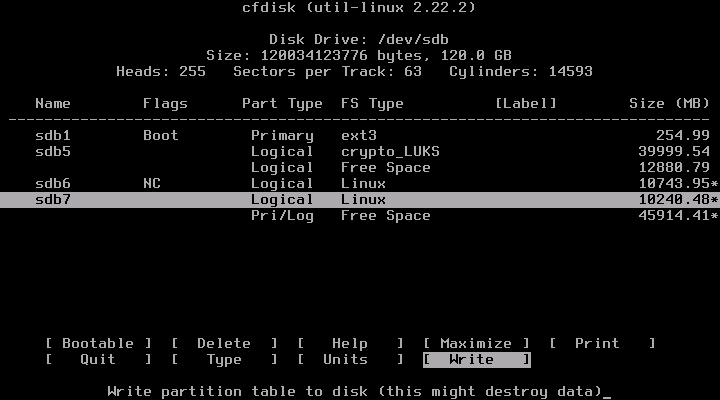
(In this example we have created a new partition /dev/sdb7.)
To guarantee that the kernel knows about the new partition, invoke a re-read of the partition table:
root@archiso ~ # sfdisk -R /dev/sdb
Use cryptsetup to use the new partition as encrypted container. Then create a new filesystem and mount it.
root@archiso ~ # cryptsetup open /dev/sdb7 tresor -M plain -c tresor -s 256 \
    -d /dev/zero
root@archiso ~ # echo $?
0
root@archiso ~ # mkfs.ext4 /dev/mapper/tresor
mke2fs 1.42.7 (21-Jan-2013)
Filesystem label=
OS type: Linux
Block size=4096 (log=2)
Fragment size=4096 (log=2)
Stride=0 blocks, Stripe width=0 blocks
625856 inodes, 2500107 blocks
125005 blocks (5.00%) reserved for the super user
First data block=0
Maximum filesystem blocks=2562719744
77 block groups
32768 blocks per group, 32768 fragments per group
8128 inodes per group
Superblock backups stored on blocks:
		32768, 98304, 163840, 229376, 294912, 819200, 884736, 1605632

Allocating group tables: done
Writing inode tables: done
Creating journal (32768 blocks): done
Writing superblocks and filesystem accounting information: done

root@archiso ~ # mount /dev/mapper/tresor /mnt
root@archiso ~ #
If you are connected to a wired LAN with DHCP, internet access should be working. If you have trouble getting connected to the internet, refer to the official documentation (Installation Guide, Beginners' Guide).
Install the base system with pacstrap.
root@archiso ~ # pacstrap /mnt base base-devel
==> Creating install root at /mnt
==> Installing packages to /mnt
warning: database file for 'core' does not exist
[...]
Copy the kernel package and the command line template into the encrypted system:
root@archiso ~ # cp /root/linux-tresor*.pkg* /mnt/root
root@archiso ~ # cp /root/cmdline-* /mnt/boot
Enter a chroot and reconfigure mkinitcpio with vi or nano:
root@archiso ~ # arch-chroot /mnt
sh-4.2# vi /etc/mkinitcpio.conf
Change the HOOKS configuration variable so that it contains “encrypt” before “filesystems”:
HOOKS="base udev autodetect modconf block keyboard encrypt filesystems fsck"
Install the TRESOR kernel and build a new initrd:
sh-4.2# pacman -U /root/linux-tresor-3.6.11-1-x86_64.pkg.tar.xz
[...]
sh-4.2# mkinitcpio -p linux-tresor
==> Building image from preset: 'default'
[...]
Edit /boot/cmdline-linux-tresor, make sure the correct partition name is given for cryptdevice (in our example: /dev/sdb7):
ro root=/dev/mapper/tresor cryptdevice=/dev/sdb7:tresor crypto=:tresor:256::
	cryptkey=rootfs:/bin/sh tresor.key=cpu0
Set a hostname, timezone, locale, etc. as described by the official documentation (Installation Guide, Beginners' Guide).
Finally escape the chroot by typing exit. Unmount the filesystem and close the encrypted container:
sh-4.2# exit
exit
arch-chroot /mnt  8.71s user 2.26s system 1% cpu 10:14.40 total
root@archiso ~ # umount /mnt
root@archiso ~ # cryptsetup close tresor
root@archiso ~ # sync
root@archiso ~ # reboot
Then reboot into POTTS and press F3 at the main screen. Enter the correct device name for the encrypted container (in our case: /dev/sdb7).
Now boot the system as described under Daily Use.
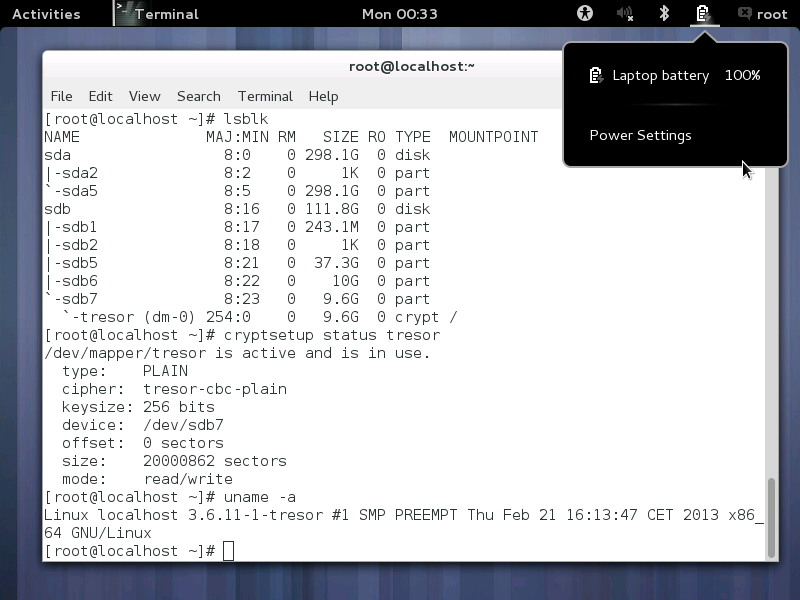
Carry on with installing and customizing your new Arch Linux system! (Again: Refer to the official documentation for details: Installation Guide, Beginners' Guide.)
A successful installation could look like this:
Attention: You are on your own. We will just provide some hints:
It is also possible to install another Linux distribution. For Debian we already provide debootstrap. Read the installation instructions for Arch to figure out what you will need to provide so that POTTS can boot your system.
Essentially you need these files in your encrypted container:
The initrd must be able to open plain dm-crypt encrypted volumes. You'll need to specify tresor.key=cpu0 along your other boot parameters in the text file. Most likely you will need to set some parameters that will tell your initrd how to open the container and mount the root file system.
The TRESOR patch is provided in /root. There is also the Arch kernel package. You can probably extract and use that kernel if you do not want to build your own.
Again: You are on your own. We will just provide some hints:
Perform the setup phase (F2) and boot into the Archiso Live system (F10).
For this example we will assume you want to convert the partition (/dev/sdb7). Create a partiton of the same size on an external or secondary hard disk (e.g. using cfdisk; we assume the new partition is (/dev/sdd3). Copy all data from the pre-existing partition to the new one:
root@archiso ~ # dd if=/dev/sdb7 of=/dev/sdd3
root@archiso ~ # sync
Use the initial partition as encryption container and copy everything back:
root@archiso ~ # cryptsetup open /dev/sdb7 tresor -M plain -c tresor -s 256 \
    -d /dev/zero
root@archiso ~ # dd if=/dev/sdd3 of=/dev/mapper/tresor
Now you can mount /dev/mapper/tresor and provide the necessary files in /boot of that files system (a TRESOR-enabled kernel, an initrd and a command line file, for details see section “Installing a Different Linux Distribution”).
Finally unmount everything, reboot and test if everything works as expected. If so, hide the backup of your partition at a secure location or delete it by overwriting:
root@archiso ~ # dd if=/dev/zero of=/dev/sdd3
Connect your USB drive and boot the computer. Press F1 at the POTTS main screen:
If loading the configuration file fails, you probably just forgot to set the container path (F3).
POTTS tries to unseal your current monce. If that fails your system has either been compromised, you have altered a part of your system that is relevant to the boot process (e.g. installed a BIOS update) or there is a problem with your TPM. Refer to the Recovery section in that case.
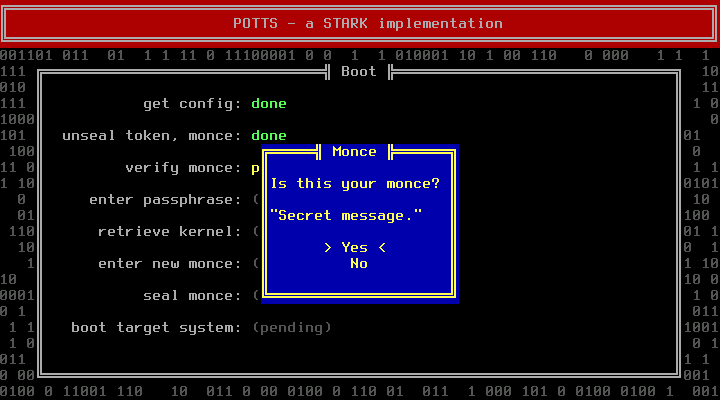
If the monce is not the last monce you have entered but a previous one, the machine is probably compromised and this might even be a fake prompt. Do not enter your passphrase under these circumstances. Destroy the computer and abort your mission.
Is the monce the expected one, enter your passphrase in the next dialog:
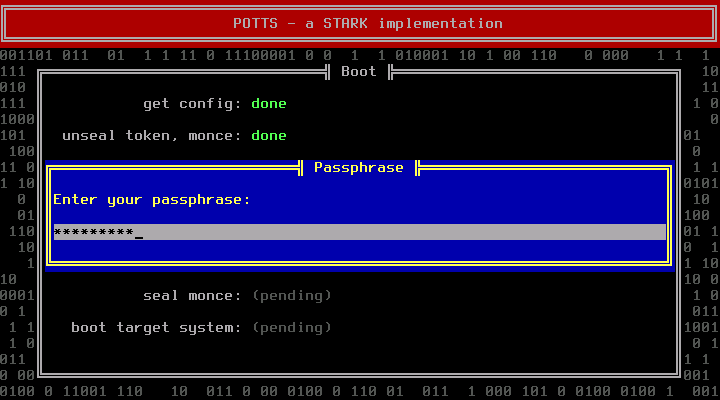
Decrypting the DEK will fail if the passphrase is incorrect. In that case go back to the main screen, press F1 and redo all previous steps.
After entering a correct passphrase, POTTS can successfully decrypt the DEK and will open the encrypted container to retrieve the target kernel. If retrieving the kernel fails, you have either entered a wrong DEK during setup or the encrypted filesystem is broken. To fix the first problem, redo the setup phase; to fix the second, see the recovery section (“Damaged/Unmountable Root File System”).
Assuming everything went ok, you will be asked to enter a new monce:
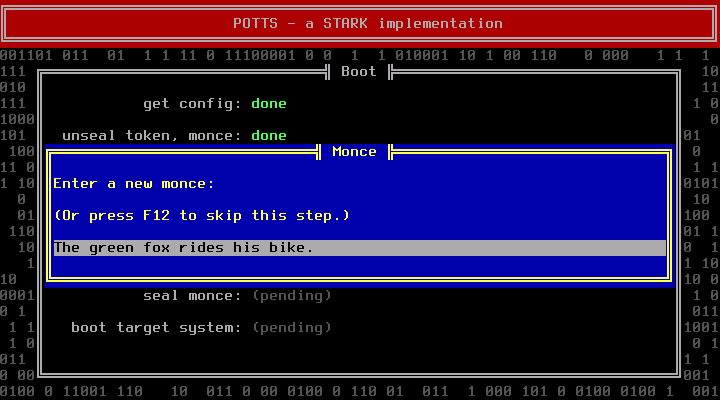
You can also skip this step by pressing F12. Then the previous monce will be reused. A star (*) will be appended. This has no security benefit at all, the only purpose is to indicate that you have been lazy.
Only ever skip this step if you are absolutely sure that nobody can gain access to your system between this boot and the next one. By skipping you trade convenience against the ability to detect a fake prompt. (An attacker could have obtained previous monces through Tamper and Revert Attacks.)
If you are unsure whether someone might be watching while you enter a new monce, you can press F11 to mask the input field.
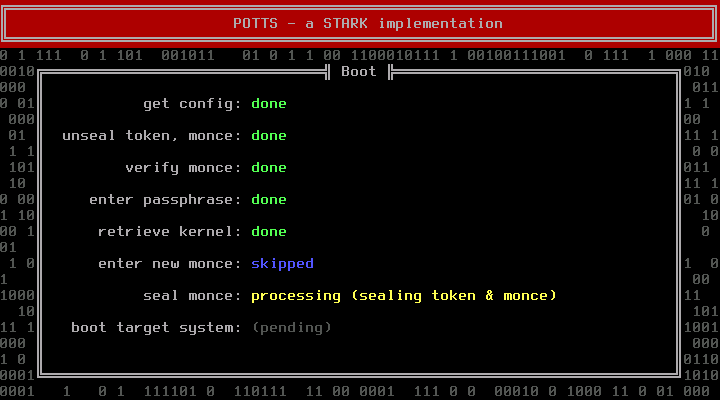
After entering a new monce, POTTS will seal it and store it on the USB drive:
Finally you are only one key press away from booting into the target system:
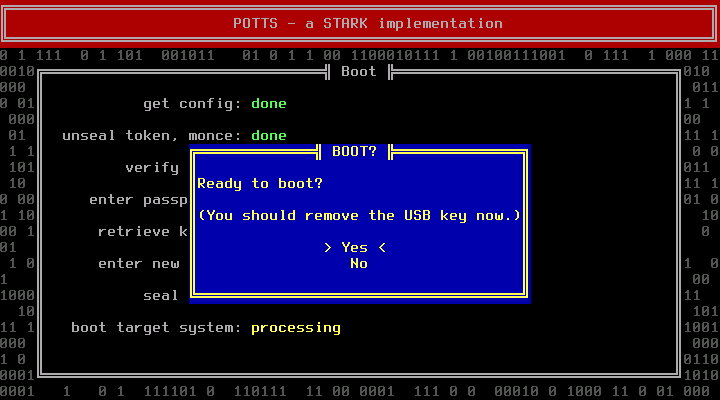
(The purpose of this dialog is to allow you to boot into the Archiso Live system instead, after the DEK has been feed into TRESOR. See the recovery section for details (“Bad Kernel or Initramfs Upgrade”).
After pressing enter the kernel of the target system will be executed.
You should remove the USB drive first. Strictly speaking, the STARK protocol does not cover anything that happens after booting up. You are on your own after that point. However, especially if a non-root user can mount file systems in the target system, not removing the USB drive would create an unnecessary risk. An attacker could try to infect your system via email with a trojan. Even if that trojan does not gain root access, the attacker might be able to obtain your current monce, and then install a fake prompt to your system during an Evil Maid Attack.
To change the passphrase, redo the configuration of POTTS (see “Configuring POTTS”).
You can upgrade the kernel in the target system. Just see to it that a new kernel still has the TRESOR patch applied and can carry over a key left in CPU 0. Since POTTS loads the kernel from the encrypted container no change to the USB drive is required.
If you have changed parts of your system that are measured during the boot process, unsealing of the monce will fail. In that case you just need to redo the configuration of POTTS (see “Configuring POTTS”).
However, unsealing can also fail due to manipulations by an attacker while you were away from your system. If you are not sure whether you have caused the problem, you should assume that the system is compromised. Carefully decide how to proceed. One option would be to remove the hard disk from that system, installing it into a safe second system and proceeding with the next section.
Should your main system break, but the hard disk survives, you have two options:
Install the hard drive in a secondary system that also has a TPM. Then follow the Installation instructions to ensure the TPM is accessible and POTTS is configured. Be careful to choose to enter the DEK manually instead of generating a new one. You might need to set a different container path. (Obviously you skip installing a new Linux system). After that you should be able to boot into your system again.
Alternatively you can install the hard drive in another system (with or without a TPM) that is running a TRESOR kernel with enabled sysfs interface (but TRESOR is not used, otherwise setting a new key would corrupt any open container). To access the data of your encrypted container, set the DEK, run cryptsetup and mount the filesystem:
# echo -n '000102030405060708090a0b0c0d0e0fa0a1a2a3a4a5a6a7a8a9aaabacadaeaf' \
    > /sys/kernel/tresor/key
# cryptsetup open /dev/sdXX tresor -M plain -c tresor -s 256 -d /dev/zero
# mkdir -p /mnt/tmp
# mount /dev/mapper/tresor /mnt/tmp
(Replace 000102...aeaf with your real DEK, in hex without spaces; and /dev/sdXX with the real device name of your encrypted container.)
Performing a kernel upgrade is not entirely risk free. The target system might be unable to boot afterwards.
To fix such circumstances, go through the Boot process of POTTS, but select “No” when asked if ready to boot. The DEK will be loaded into TRESOR at this point. Press F10 at the main menu to boot into the Archiso Live system. Use cryptsetup and mount to access the encrypted container and restore the previous kernel and/or initrd. See the installation instructions for details (“Installing Arch”).
If your root file system got damaged somehow, the kernel image and initrd can not be retrieved during the normal boot process (F1).
Like in the case of a hardware failure, redo the setup (F2) process (enter the DEK manually). After the setup phase the DEK has been loaded into TRESOR. Press F10 to boot into the Archiso Live system, open the encrypted container with cryptsetup (as described in the Installation instructions). Now you can run fsck on the file system (/dev/mapper/tresor).